How To Make A Putting Green: Backyard and Indoor (DIY)
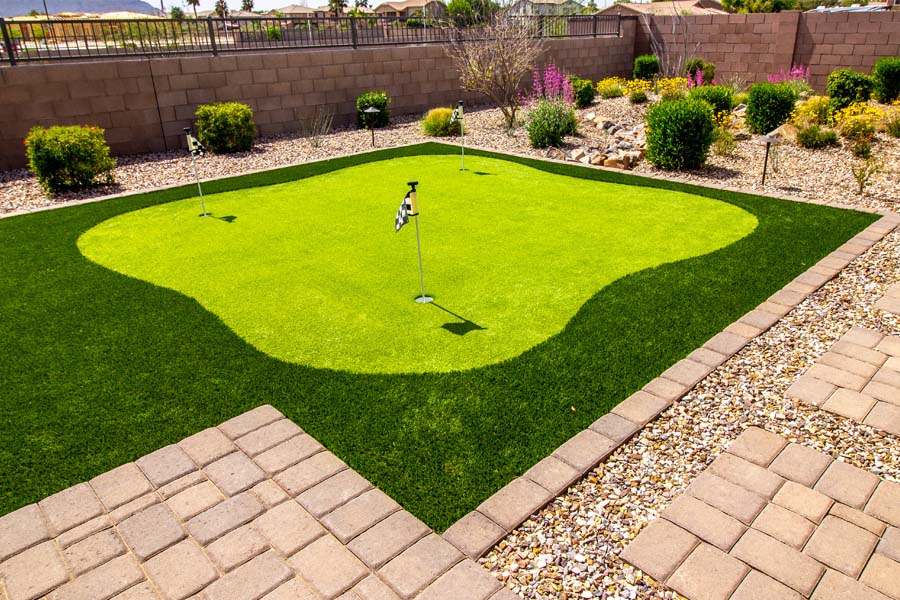
Learn how to make a putting green both indoors and outdoors in your backyard with these step-by-step instructions and simple tips.
Having a professional company install a putting green or ordering a putting green kit can be expensive. For instance, the putting green installation cost can vary between $ 5,000-12,000, which is a hefty amount for many people.
However, you can easily create your own “ DIY putting green” with some basic skills and knowledge.
This article will guide you through the process of building a backyard putting green in your outdoor area or an indoor putting green in your home.
I. How to make a putting green: Backyard putting green
Before diving into the instructions, ensure that you have all the necessary tools. Having the required tools ready beforehand will not only save time but also reduce the hassle during the installation process.
Here is a list of tools you need to have handy before you start:
- Shovel
- Rake
- Pick
- Measuring tape
- Utility knife
- Adhesive tape
- Turf pegs or staples
- Rubber mallet
- Hand tamper
- Wheelbarrow
- Spirit level
- Marking chalk
- Crushed gravel or sand
- Weed killer
- Sod cutter or line trimmer
Step 1: Choose the location of your DIY putting green
When constructing a DIY putting green for your own backyard for practicing golf at home, the first step is determining an appropriate location.
About 1,000 square feet is a manageable size for putting greens and would give you ample space to practice different shots.
Ensure it is located on leveled terrain with proper drainage. To avoid accidents or damages, place your installation far away from the house and other structures so that any errant golf balls won’t pose a risk to passers-by or people inside the house.
Additionally, ensure the chosen spot receives ample sunlight and is not too steep. When selecting synthetic putting green turf, opt for lower nap options, as they offer better playability.
Typically, artificial putting green is available in rolls measuring 7 1/2′, 12′, or 15′ in width.
Note: Alternatively, you can opt for seeding or sodding with real grass instead of synthetic turf. However, seeding requires time, extensive care, attention, and post-maintenance. Nevertheless, natural grass putting green offer quality and long-lasting turf.
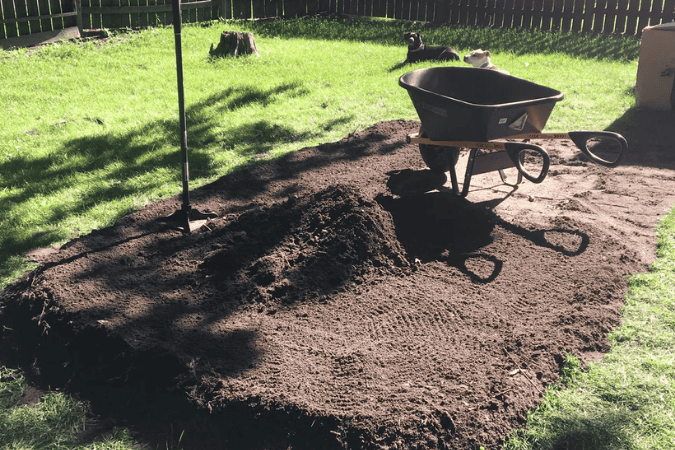
Step 2: Design, measure, and mark
Once you have selected a good location for your outdoor putting green, it’s time to plan its design. Crafting the ideal putting green requires careful planning and deliberation.
- Start by jotting down the size and shape of your design, including where you would like to place each cup.
- Get a measuring tape and measure the overall dimensions of your putting green.
- To get an accurate measurement, use a marking chalk to mark the edges of your desired green.
- Once you have marked the desired spot, use a sod cutter or line trimmer to cut down the grass within your outlined area until it reaches dirt.
- Remove any debris from the mowed area.
- For a more engaging experience, consider creating a complex layout with interesting obstacles, providing the feel of playing on an actual golf course.
Note: Ensure that the slopes direct away from the center to prevent rainwater from accumulating and forming puddles on your course. This step will help maintain a smooth and enjoyable putting surface.
Step 3: Dig the base and cups
Dig down inside the outline about 8-10″ around the perimeter for installing pavers or some other border material to secure the artificial turf putting green and making it look nice.
For a lasting solution to weeds and grass, apply weed killer generously to the ground and cover it with landscape fabric for protection. While creating a slope along the putting green, do not go any higher than 2.5 percent.
An integral part of constructing a backyard and putting green is selecting the exact positions for the cups. Although the cups have holes cut in them, it is recommended to create a shallow trench leading away from each cup past the green area.
To ensure proper draining of rainwater, fill these trenches with small stones or pea gravel. Mark the locations of the cups for you to find them later.
Step 4: Install base material
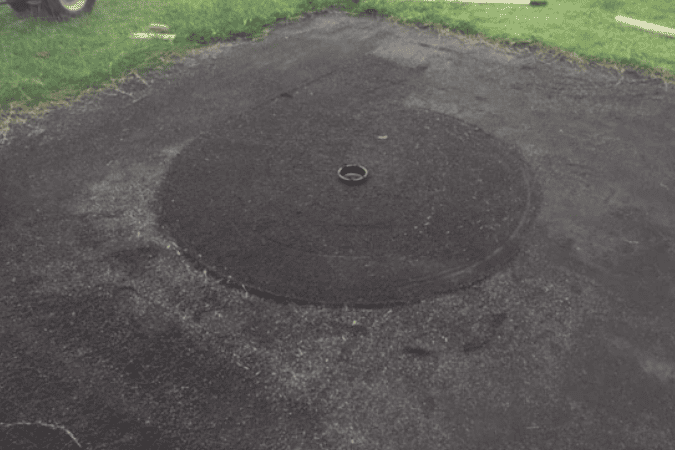
Lay down a layer of crushed gravel or sand evenly to form a smooth, flat surface before installing your putting green turf.
- Moisten the rocks and use a hand tamper (for a small putting green) or a lawn roller to make the base flat and compact.
- Remove the gravel from the place where the cups are supposed to be and make holes for the cups with a spade or shovel.
- Level out the area around the cups again.
- Ensure that a 3-foot radius around each cup is perfectly flat and smooth with a level. This will allow the ball to roll in properly.
Step 5: Install the putting green turf
Spread and lay down the turf over the area according to your design and layout.
The synthetic grass should extend at least 1 foot beyond each cup. Use a utility knife to carefully cut around the borders of the entire putting green to bring it to shape.
Using the same utility knife, cut around each cup hole, making sure that no part of the turf overlaps into the cup hole.
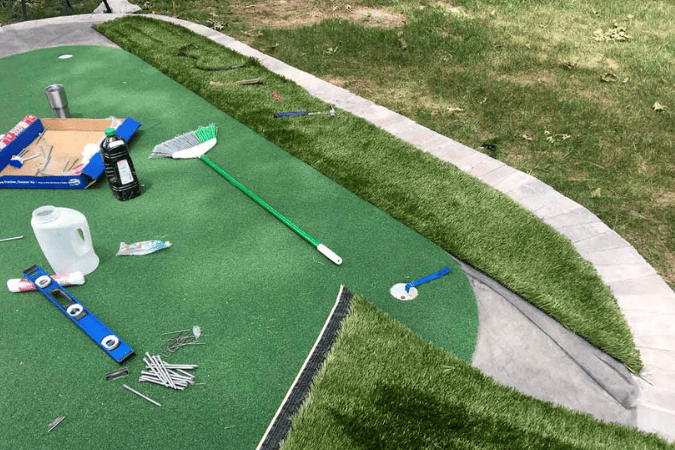
Next, once your putting green turf is laid down correctly and in place, attach it with turf pegs or staples along the perimeter of its sideboards. Use a rubber mallet to make sure that no part of the turf is loose and everything is firmly in place.
Step 6: Topdress the turf
Once your putting green turf is installed, you may top-dress the entire surface with a thin layer of sand. This will serve as an anchor for the grass blades to the base and provide additional weight.
Topdressing also helps even out any wrinkles or ridges that were missed while initially laying down the turf.
Finally, brush the sand into the fibers of the grass and use a leaf blower to disperse it evenly over your putting green surface.
Step 7: Landscape the green
Landscaping can help to enhance the visual appearance of the putting green. Installing landscape edging such as stones, bricks, or timbers can also add a nice touch to your backyard design. Here are some ways to landscape:
- Add a border: Choose a stone, brick, or treated wood to create a border around the putting green. This will add an aesthetic touch and help keep all your turf in place for years to come
- Add a fringe: If desired, add a fringe of grass around the putting green for a more natural look.
- Rocks or plants: Adding rocks and plants can enhance the look of your putting green.
Step 8: Install the cups
Carefully place the cups in their designated holes and make sure that each cup is level with the putting green surface.
Ensure that no part of the cup is above the turf, as this could affect how a golf ball rolls in. Fill in any gaps between the ground and sides of each cup with soil or sand, ensuring that they are supported firmly by their designated holes.
Step 9: Test and adjust
Fill the cups with plastic golf balls and test them on your freshly installed putting green. Adjust the turf, sand, or soil if necessary to make sure that each cup is properly leveled and ready for use.
Put additional landscape fabric or top dress again if needed.
Step 10: Maintain the green
Regularly groom the green by brushing and raking to keep it looking its best. Mow regularly to avoid the buildup of debris or weeds. Check for any damage or loose edges of turf and replace them if needed.
II. Indoor putting green DIY: Step-by-step process
Indoor putting green installation is not as complex as outdoor installation. Refer to the following list and keep all the supplies and materials ready.
- Wood boards for the outer and inner frame
- Plywood sheets
- Nails and hammer
- Screws
- Driller
- Hammer
- Circular saw
- Framing square
- Putting green turf
- Carpet knife
- Trowel
- Carpet adhesive
- Lightweight books or bricks
- PVC pipe: 3/4″
- Hole saw blade: 4.25″
- Regulation cups: 4.25″
Now, here are the steps to install an indoor putting green:
Step 1: Choose a size and location
Decide on the size based on the maximum length of putt you want to practice and the available space. Aim for at least 10 square foot putts as your primary focus. Consider using plywood or particle board sheets of 4 ft x 8 ft for easy construction.
Step 2: Construct the frame
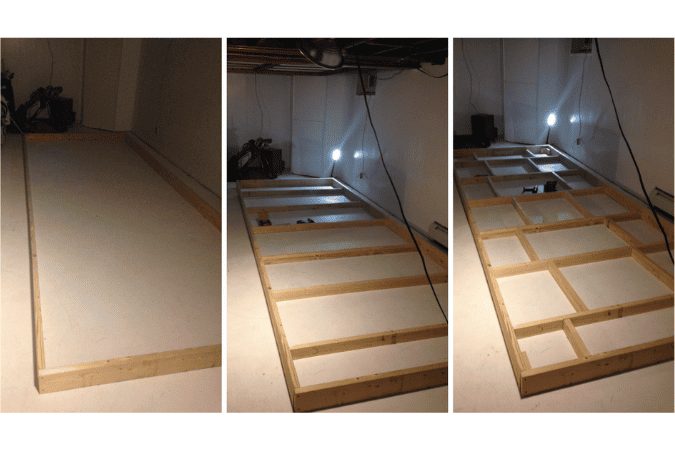
To build a self-contained indoor putting green, you’ll need both an outer and inner frame.
Outer frame:
For the outer frame, you choose 2”x4”, 2”x6”, or 2”x8” wood boards. However, we recommend 2”x6” or 2”x8” for sturdiness and to avoid cup height issues.
Consider longer sides for a square or rectangular, putting green. Use a power drill to create 2-3 pilot holes for each corner. Insert the correct-sized nails and secure the frame with a framing square. Pre-drilling is optional but can be helpful for beginners.
Inner frame:
Trim the inner frame boards by three inches using a circular saw to account for the frame’s thickness. Space the inner boards around 1.5 to 2 feet apart and secure them to the frame with nails or screws.
Ensure one inner support aligns with the crease where multiple plywood sheets meet. Mark and trim excess regions on the plywood sheets to fit the frame.
Step 3: Base Material and plywood installation
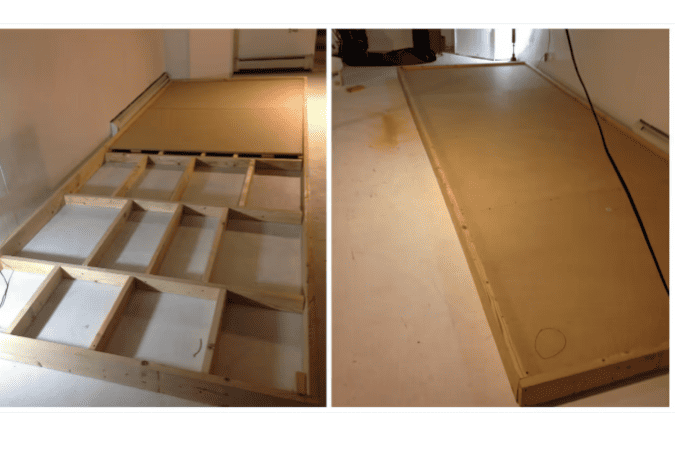
For the base of your putting green, you can use cheaper particle board, but we recommend sturdier plywood sheets if you can afford it.
Lay the plywood sheets over the frame, ensuring flush edges. Screw down the corners first, then add screws along the perimeter and inner cross-beams. Make sure to have one screw every 1-1.25 feet.
Check that all sheet edges inside the frame have proper support from cross beams.
Step 4: Marking cup holes
Before you start marking, measure the diameter of the cups. Generally, regulation golf cups have a 4.25-inch diameter. However, for indoor putting green, you can use smaller cups if needed. Now,
- Choose 2-5 hole locations based on your build size.
- Consider your dominant hand (left or right) when selecting hole locations.
- Place holes near the edges for longer putt practice.
- Keep holes at least three inches away from frame beams.
Step 5: Drilling the holes
Drilling cup holes can be a bit challenging, especially with plywood, but with patience and preparation, it’s manageable.
- Start by drilling a small hole at the center point to guide the hole saw blade.
- Use a 4.25″ hole saw blade with a pilot bit.
- Take your time and consider using the drill in reverse if needed.
Step 6: Glue down the turf
Always get high-quality turf to ensure a professional-looking indoor putting green.
Once you get your turf, let it flatten out on the platform with weights on top for a few days. Apply carpet adhesive with a trowel to the surface, rolling the turf in sections.
Follow the adhesive instructions and avoid foot traffic on the glued turf for 1-2 days. Use books or light bricks to hold it in place while it dries, and trim any excess turf with a carpet knife.
Step 7: Install the cups
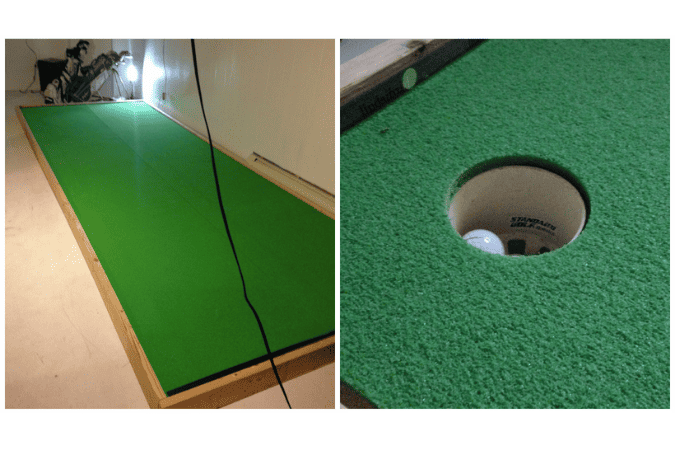
Mark the hole locations and cut X-shaped holes in the turf. Push regulation cups through the holes until flush with the green surface.
Step 8: Add a backstop support
Prevent balls from falling over the side by installing a backstop around the putting green. Use 3/4″ PVC pipes to create a bumper rail, ensuring it fits your build by joining pipes with couplers if needed. Nail the elbow fittings and center points of each side to the frame to secure the bumper rail in place.
III. Tips to DIY putting green
Here are a few simple tips to keep in mind when installing a putting green:
1. Order a little more turf than planned
You may run out of synthetic grass due to underestimating your requirement. Thus, it is best to buy some extra instead of making last-minute changes.
2. Infill
This is especially important if you plan to use your putting green regularly. The infill helps maintain the artificial turf’s uprightness while protecting and safeguarding its backing system from expanding or contracting due to changing weather conditions.
IV. What is a good size putting green?
The ideal size of a putting green depends on the available space and your preferences.
For most homeowners, a putting green with dimensions around 10 to 20 feet in length and 6 to 12 feet in width would be sufficient for enjoyable practice and gameplay.
If you have a larger yard or more space available, you can consider expanding the size accordingly.
V. How long do putting greens last?
The lifespan of a putting green depends on factors like materials used, maintenance, and environmental conditions.
Synthetic turf greens can last 10 to 20 years with proper care, while natural grass greens may have a shorter lifespan and require more maintenance.
Conclusion
Installing a putting green in your backyard or indoor settings can be a great way to improve your golfing skills or have fun with family and friends.
By following the steps outlined above, you can enjoy the same putting experience as on the golf course without having to leave your own property. Additionally, with proper maintenance and care, your putting green can survive for many years.
FAQs
1. What type of sand is used on putting greens?
Putting greens use a specific type of sand called “silica sand.” This sand has fine particles for smooth ball roll, consistent size distribution, firmness, good drainage, and an off-white or light color for aesthetics.
2. What do you put under a putting green?
Before laying down the turf, make sure to install a layer of crushed gravel for efficient drainage. This helps minimize water build-up and keep your turf clean and healthy. Additionally, use weed barrier sheets or spray to avoid weed growth in the putting green.


